Temperature Tamer: Using Shade Nets to Optimize Greenhouse Temperature

Temperature Tamer: Using Shade Nets to Optimize Greenhouse Temperature

Introduction: The Greenhouse Paradox

Greenhouses are designed to trap solar energy, creating a warm environment ideal for cultivation, especially in cooler climates. However, in regions with intense sunlight or during hot summer months, this very function becomes a liability. The trapped heat can rapidly cause temperatures to soar beyond $40^circ C$ ($104^circ F$), leading to heat stress, flower abortion, and complete crop failure.

HDPE (High-Density Polyethylene) Shade Nets are the most effective and cost-efficient external solution for managing this heat risk. They serve as a sophisticated sun filter, reducing the incoming solar load to maintain the internal greenhouse temperature within the optimal range for plant growth.

This guide explores the scientific principles and practical techniques for using shade nets to optimize the temperature inside your greenhouse.


I. The Scientific Role of External Shading

Shade nets manage greenhouse temperature by addressing the two main drivers of heat buildup: solar radiation and heat retention.

1. Blocking Solar Radiation (The Heat Source)

  • Radiation Reduction: An externally installed shade net, typically in the $30%$ to $50%$ range for most greenhouses, acts as the first line of defense. It intercepts a significant percentage of solar radiation before it passes through the plastic or glass roof.

  • Preventing Surface Heating: This radiation blockage prevents the internal surfaces (soil, benches, walls) from heating up excessively. These surfaces are the primary source of radiant heat that raises the air temperature inside the greenhouse.

  • Cooling Effect: By blocking the radiant energy, the shade net can effectively lower the internal ambient temperature by $5^circ C$ to $10^circ C$ compared to an unshaded greenhouse, bringing the environment back into the plant’s metabolic comfort zone.

2. Diffusing Light Quality

  • Stress Reduction: The net converts harsh, direct sunlight into diffused light. This soft light spreads more evenly across the leaves, reducing localized temperature spikes (hot spots) on the leaf surface.

  • Improved Photosynthesis: This diffused light is often utilized more efficiently by the lower leaves, boosting overall plant productivity without causing the stress associated with direct, intense light.


II. Key Techniques for Temperature Optimization

The effectiveness of a shade net depends on the material chosen and its method of deployment.

1. Choosing the Right Density

  • The Crop is Key: The density must be matched to the specific crop. A $30%$ net might be ideal for heat-sensitive fruiting crops like bell peppers in a moderate climate, while a $50%$ net might be necessary for cucumbers or propagation areas in a tropical climate. Too high a density ($75%+$) will cause ‘legginess’ (etiolation) and severely reduce fruiting.

  • The $5^circ C$ Rule: Start with the lightest shade net that achieves the required temperature reduction. For every 10% increase in shade density, expect a further marginal drop in temperature.

2. External vs. Internal Placement

Placement Temperature Control Benefit Drawbacks
External (Recommended) Superior. Blocks heat before it enters the structure. Better airflow keeps the net itself cooler. Requires a stronger frame or cable system for installation.
Internal Moderate. Trapped heat is reradiated inside, offering less overall cooling effect. Easier to install and remove. Can be combined with thermal screens for energy saving at night.

3. The Retractable System

  • Maximum Flexibility: The ideal solution for temperature optimization is a retractable external shade system (often motorized or pulley-operated).

  • Dynamic Control: This allows the net to be deployed only when needed (e.g., between 10 AM and 4 PM) and retracted on cloudy days or evenings. This maximizes natural light when temperatures are safe and provides cooling precisely when heat stress is highest.


III. Shade Net Integration with Other Systems

For complete temperature mastery, the shade net must work with the greenhouse’s existing infrastructure.

1. Ventilation Synergy

  • Heat Escape: No shade net can work effectively without proper ventilation. Ensure the greenhouse vents (roof and sides) are open when the net is deployed. The net keeps the air coming in cooler, and the open vents allow the hot air that still rises to escape.

  • Fan Systems: Use exhaust fans to actively pull hot air out, creating negative pressure. The shade net reduces the initial temperature of the incoming air, making the fan system much more efficient.

2. Water Management

  • Reduced Stress: Since the shade net reduces heat stress, the plants lose less water through transpiration, improving the efficiency of the drip irrigation system and reducing the need for fogging or misting systems.


IV. Conclusion

Shade nets are an indispensable tool for turning a seasonally challenging greenhouse into a year-round productive asset. By scientifically managing solar radiation, they lower the ambient temperature, reduce plant stress, and create the stable, optimal environment required for successful cultivation. Investing in a quality, correctly deployed shade net ensures that your greenhouse stays in the profit zone, even when the sun is at its most intense.


Frequently Asked Questions (FAQ)

Q1: Will a shade net reduce the need for cooling systems?

A: Yes. By significantly lowering the initial temperature, a shade net reduces the cooling load required by fans, misting, or pad systems. This leads to reduced energy consumption and lower operational costs for the cooling equipment.

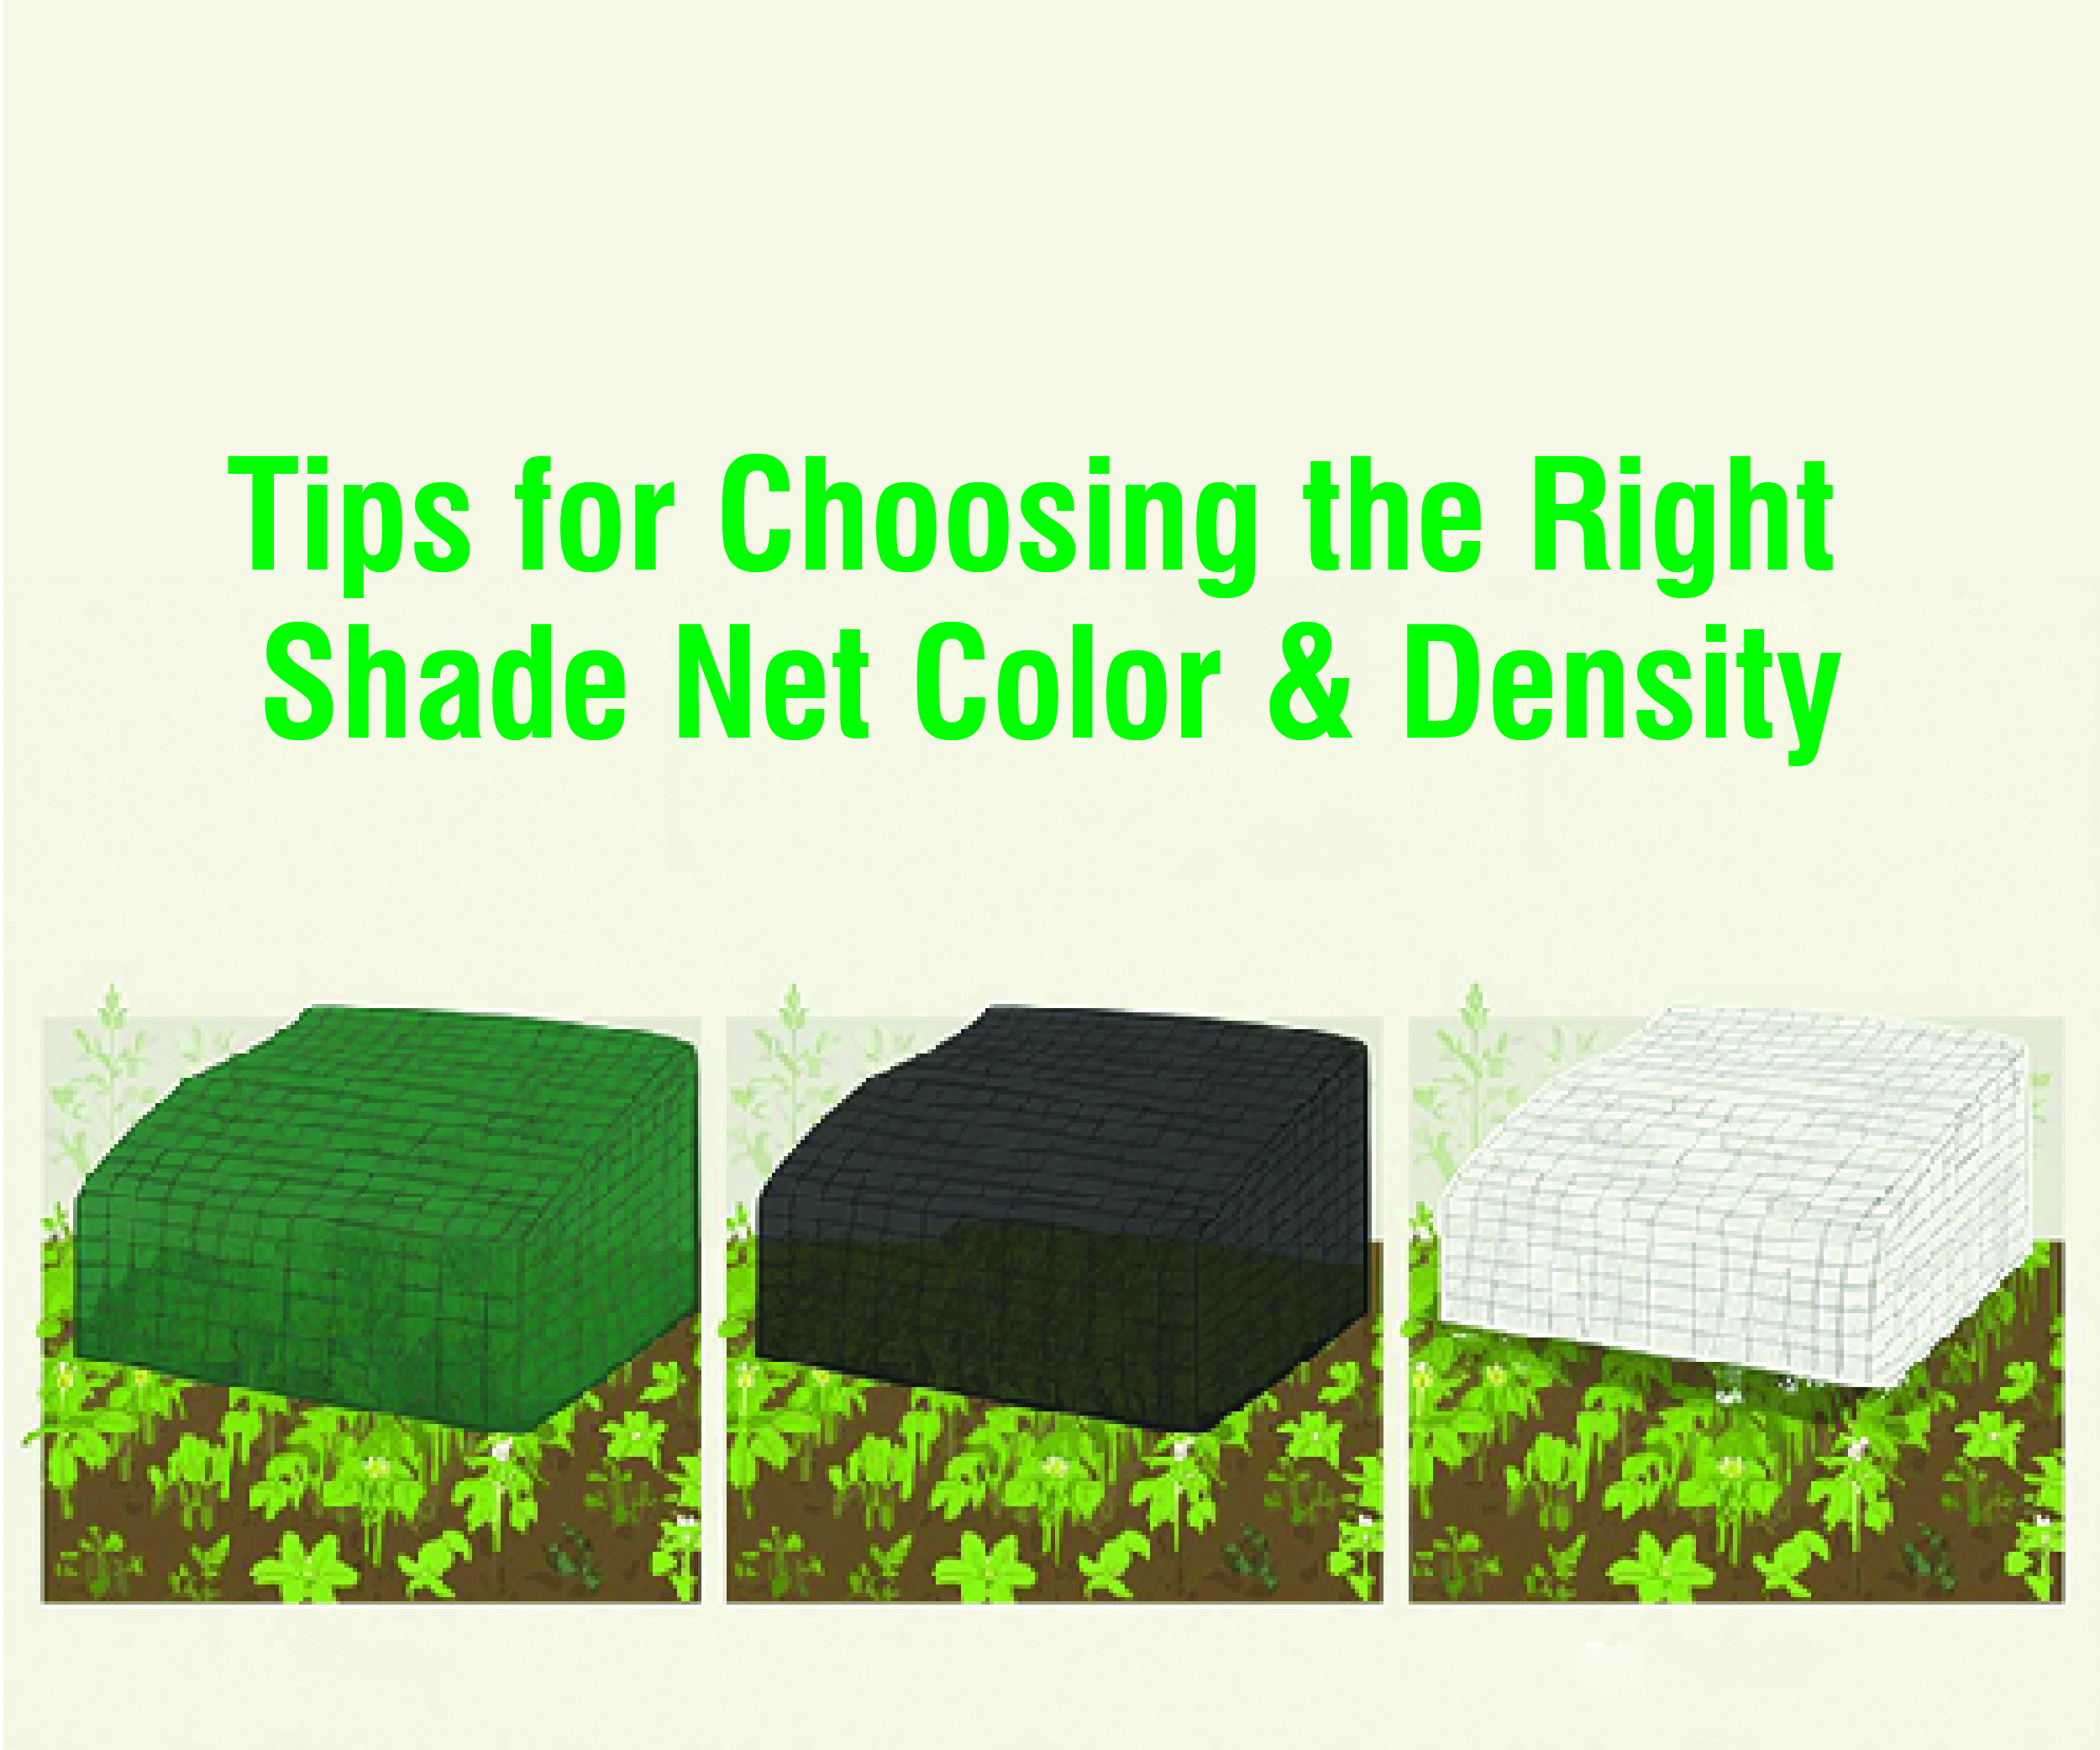
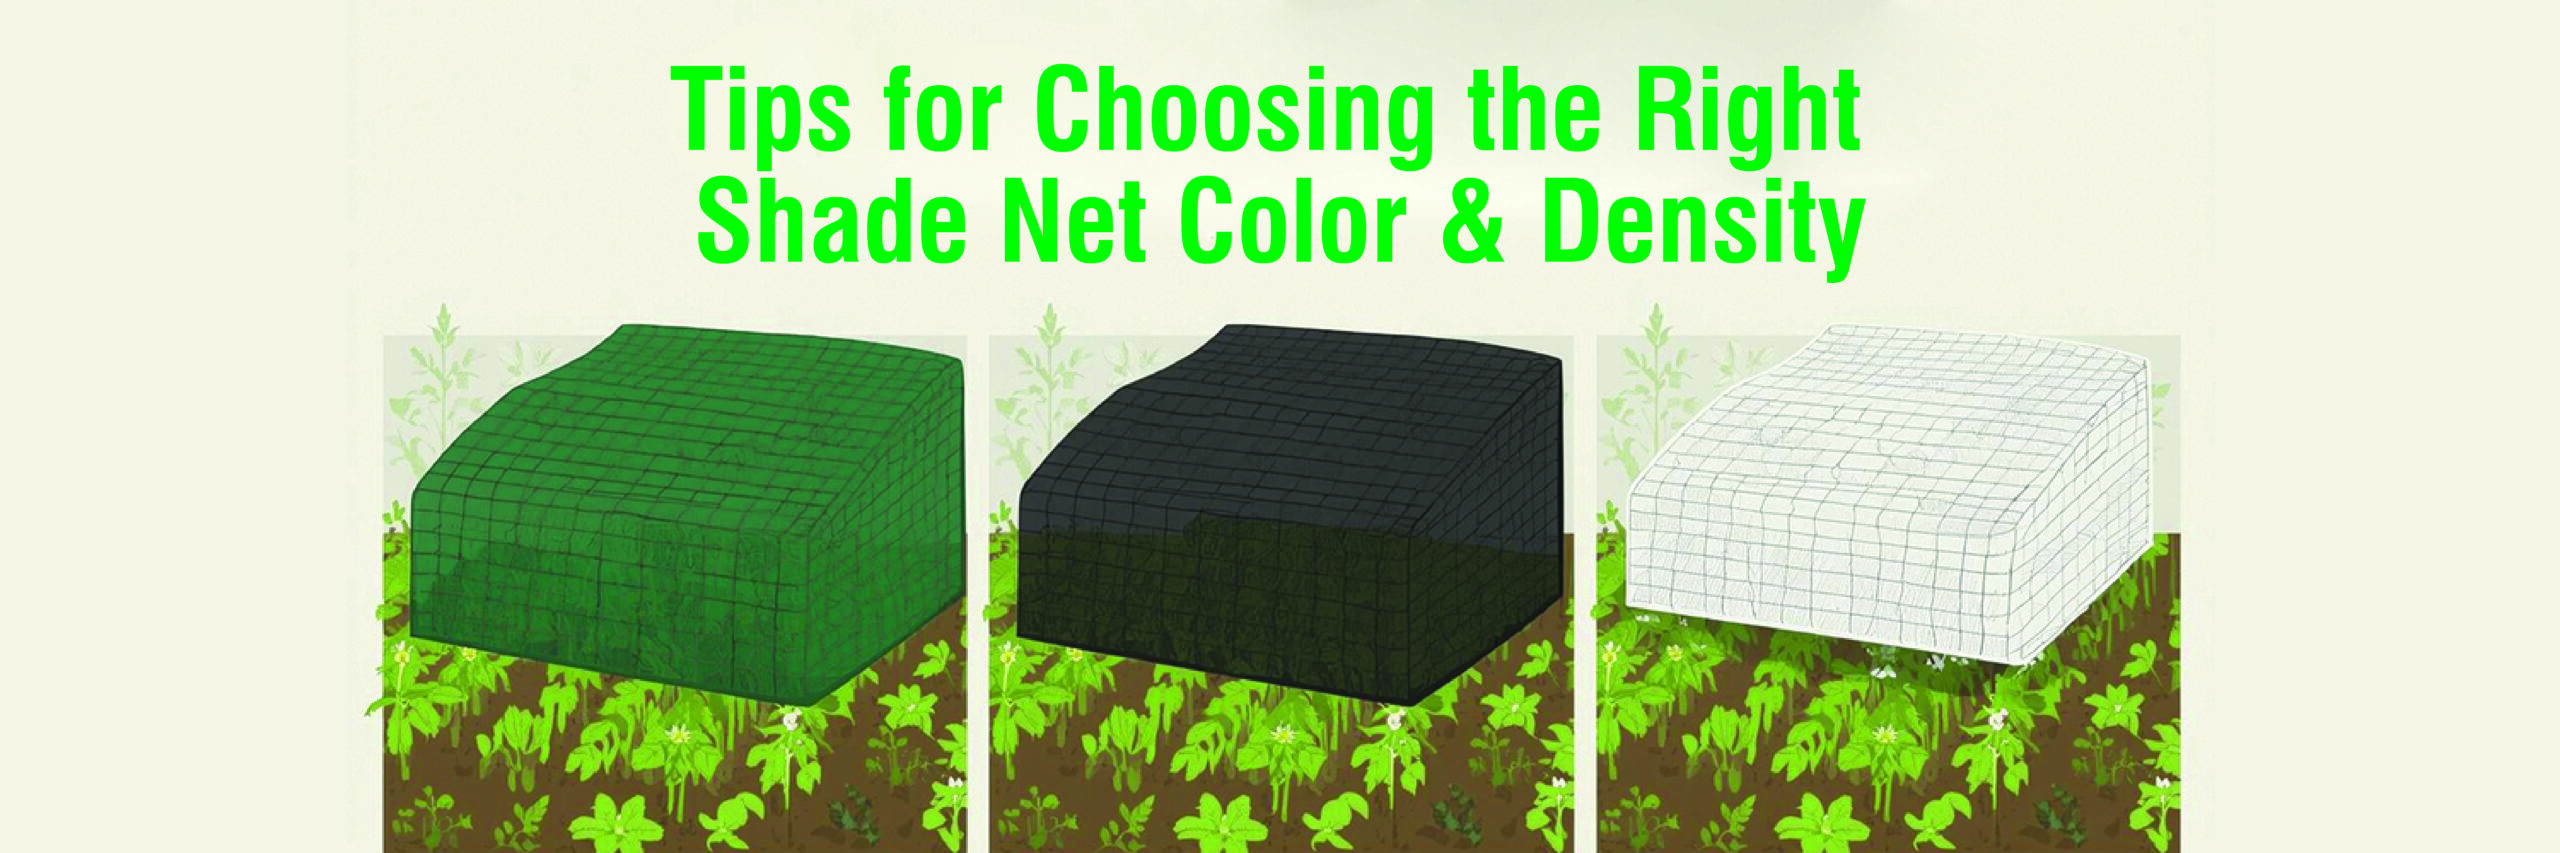
Q2: Does the color of the shade net matter for temperature optimization?

A: Yes. White or Pearl/Silver nets are often superior for temperature control because they reflect more solar energy away from the structure, leading to a cooler overall effect than black nets, which absorb the heat.

Q3: What are the risks of using a fixed (non-retractable) shade net?

A: The main risk is insufficient light on cloudy days or during the winter. Using a fixed net year-round can lead to etiolation (stretching, weak stems) and poor flowering when light levels are naturally low, potentially harming the crop.

Q4: Can a shade net alone solve my high temperature problems?

A: No. While highly effective, a shade net must be used in conjunction with adequate ventilation. It reduces the amount of heat entering, but ventilation (open vents, fans) is required to remove the heat that is still generated and to ensure fresh air circulation.

Protecting Your Investment: Best Practices for Maintaining Agricultural Shade Nets

Protecting Your Investment: Best Practices for Maintaining Agricultural Shade Nets

Introduction: Durability Through Discipline

A high-quality HDPE shade net is built to last 5 to 8 years, but its actual lifespan depends heavily on one crucial factor: maintenance. While these nets are inherently durable and UV-stabilized, continuous exposure to harsh weather, wind stress, and accumulation of debris can drastically shorten their life and compromise their protective function.

Effective maintenance is not just about fixing damage; it is about taking proactive steps to ensure the net remains taut, clean, and structurally sound throughout the seasons. This translates directly into consistent crop protection, lower long-term costs, and maximum return on investment (ROI).

This guide provides a step-by-step checklist of best practices for maintaining your agricultural shade net and its support structure.


I. Seasonal and Routine Inspection

Regular checks are the first line of defense against costly failures.

1. Post-Weather Inspection (Most Crucial Step)

  • After Every Major Storm: Immediately after high winds, heavy rain, or hail, inspect the entire structure. Focus on corner posts, perimeter wires, and tension points.

  • Check for Sagging: Look for areas where the net has stretched or sagged, especially in the center. Sagging collects water, which can collapse the entire structure.

  • Inspect Anchors: Verify that ground anchors, guy wires, and turnbuckles are still firmly secured and have not pulled out of the ground or foundation.

2. Tension Monitoring (Quarterly)

  • Tautness is Key: The net must remain drum-tight. A loose net flaps, leading to rapid wear and tear along the edges and attachment points.

  • Use Tensioners: Regularly tighten turnbuckles and tensioning hardware on the support wires to remove any slack caused by material stretching or settling of the structure.

3. Attachment Point Check (Monthly)

  • Net-to-Wire Integrity: Ensure that all clips, grommets, and lacing ropes securing the net to the frame wires are intact and holding firmly. Replace any broken or brittle clips immediately.

  • Prevent Abrasion: Verify that the net is not directly rubbing against sharp edges of metal poles, wire ends, or screws. Use protective padding or tape on all potential abrasion points.


II. Cleaning and Damage Control

Keeping the net clean and repairing minor damage promptly prevents long-term deterioration.

1. Routine Cleaning (Annually or Biannually)

  • Remove Debris: Use a long, soft brush or a low-pressure hose to gently remove accumulated dust, leaves, bird droppings, and debris. Dirt reduces the shade net’s effectiveness by blocking light and adding unnecessary weight.

  • Avoid Harsh Chemicals: Never use abrasive cleaners or harsh chemicals, which can strip the net of its vital UV stabilizers. Use only water or mild, pH-neutral soap.

2. Immediate Damage Repair

  • Patch Small Holes: Do not ignore small tears. They can expand rapidly due to wind stress.

  • Repair Method: Use UV-stabilized, heavy-duty repair tape specifically designed for shade nets, or stitch the tear using a strong, UV-resistant thread in a lock-stitch pattern to prevent further unraveling.

  • Prevent Running: If the net is caught on something, quickly secure the tear edges with tape or thread to stop the damage from “running” across the net.


III. Structural Longevity and Off-Season Care

Maintenance extends to the entire support system and the net’s off-season storage.

1. Post and Cable Maintenance

  • Rust and Corrosion: If using GI (Galvanized Iron) or steel posts, regularly inspect them for rust, particularly at ground level and where the net hardware attaches. Apply rust-proofing paint as needed.

  • Wooden Posts: If using wooden posts, check for termite damage or rot, and reinforce or replace compromised supports before the next growing season.

2. Seasonal Removal (Optional)

  • If Netting is Seasonal: If your structure is temporary or the net is only needed during summer, carefully remove the net before winter.

  • Clean and Dry: Ensure the net is completely clean and dry before folding. Storing a damp net encourages mold and mildew.

  • Store Safely: Fold the net neatly and store it in a dark, dry, pest-free area, away from direct sunlight, which can cause premature degradation even when the net is folded.


IV. Conclusion: The Maintenance Advantage

Maintenance of agricultural shade nets is not a chore; it is a critical part of maximizing your farm’s efficiency. By implementing a proactive, consistent maintenance schedule—focusing on tension, cleanliness, and immediate repair—you will ensure your shade nets deliver their promised lifespan of high performance, year after year, securing your crops and your profitability.


Frequently Asked Questions (FAQ)

Q1: How often should I check the net tension?

A: You should perform a quick visual tension check weekly during the growing season. A comprehensive re-tensioning and hardware check should be done quarterly or immediately after any major weather event.

Q2: Should I remove the net during heavy snowfall?

A: Yes, absolutely. If you live in an area prone to heavy snowfall, the net must be removed before winter. The weight of snow can easily exceed the load capacity of the shade structure and cause catastrophic collapse.

Q3: Can a small tear be fixed with duct tape?

A: No. Standard duct tape is not UV stable and will degrade and fall off rapidly in the sun, leaving a sticky residue. Always use specialized, UV-stabilized shade net repair tape or a UV-resistant thread for durable, lasting repairs.

Q4: How do I prevent squirrels or rodents from chewing the net?

A: The most effective method is to ensure the bottom edge of the net is securely anchored, either by burying it in a shallow trench or fastening it tightly to a rigid baseboard, eliminating easy entry points for ground-dwelling pests.

The Science of Shade: Tips for Choosing the Right Shade Net Color and Density

The Science of Shade: Tips for Choosing the Right Shade Net Color and Density

Introduction: Color vs. Quantity


Selecting a shade net involves more than just picking a color that looks good. The right choice requires a scientific understanding of how light impacts plant physiology and microclimate management. The two most critical decisions when purchasing a shade net are the Density (Shade Percentage) and the Color.

Choosing incorrectly can lead to weak, “leggy” plants (too dense) or sun-scorched, stressed plants (too light). Understanding the role of each variable is essential for creating the perfect growing environment for your crops, ensuring maximum yield and quality.

This guide provides clear, practical tips on how to match the right color and density to your specific agricultural or commercial needs.


I. Choosing the Right Density (Shade Percentage)


Density, or shade percentage, determines the quantity of light that is blocked. This is the most crucial decision for crop health.


1. Understand Your Plant’s Light Needs


Plants are broadly categorized by the amount of sunlight they require:

  • High Light (Full Sun): Most fruiting vegetables (Tomatoes, Peppers), Sugarcane, and robust flowers. Need maximum light penetration.

  • Medium Light (Partial Sun): Leafy greens (Lettuce, Spinach), Cabbage, and most general nurseries. Need moderate filtering, especially in high heat.

  • Low Light (Shade-Loving): Orchids, Ferns, Medicinal Herbs, and delicate shade-house seedlings. Require heavy filtering and low light intensity.


2. Match Density to the Crop Type


Crop/Application Recommended Shade Net Density Rationale
Fruiting Vegetables (Tomato, Chili, Cucumber) 30% – 50% Reduces heat stress and sunscald without severely limiting photosynthesis required for fruiting.
Leafy Greens (Spinach, Coriander) & Nurseries 50% – 65% Essential for preventing bolting and leaf scorching; provides the soft, diffused light needed for tender foliage.
Orchids, Ferns, & Shade-Loving Ornamentals 75% – 90% Mimics a dense canopy environment, providing high shade intensity for plants adapted to low-light conditions.
Parking Lots / Livestock Shelters 80% – 90% The goal is maximum UV blockage and cooling; light requirements are irrelevant.


3. Consider Your Climate


In regions with extreme, persistent heat and high light intensity (like arid deserts), you may need to choose a shade net at the higher end of the recommended percentage range to prevent plant shutdown and heat stress.


II. Choosing the Right Color (The Quality Control)


The color of the net dictates the quality of light that passes through. Different colors can affect plant morphology, development, and temperature.


1. Black Shade Nets (The Standard)


  • Primary Effect: Reduces light intensity and provides maximum cooling by absorbing solar radiation.

  • Pros: Most durable, highest UV resistance, most cost-effective, and provides the best overall cooling effect beneath the net.

  • Cons: Can create “deeper” shadows and does not scatter light as effectively as white nets.

  • Best For: Parking, livestock shelters, nurseries, and general vegetable farming where cost and high durability are priorities.


2. Green Shade Nets (The Aesthetic Choice)


  • Primary Effect: Filters light, letting mostly green light pass through, which plants tend to reflect.

  • Pros: Visually pleasing in a garden setting, often perceived as more natural. It is popular for floriculture and general horticulture.

  • Cons: Historically, some green dyes have reduced UV stability, though modern nets are generally reliable.

  • Best For: Home gardens, general horticulture, and plants where a natural aesthetic is desired.


3. White or Pearl/Silver Shade Nets (The Diffuser)


  • Primary Effect: Reflects a significant amount of solar radiation, resulting in high light diffusion and excellent temperature management.

  • Pros: The reflected light is scattered more evenly, which can lead to better light penetration into the canopy. Provides superior cooling in extremely hot climates compared to black nets.

  • Cons: Can be more expensive and may require more frequent cleaning to maintain reflection efficiency.

  • Best For: Extremely hot, arid regions where cooling is the priority, and for specialized high-value crops (like some flowers) that benefit from highly diffused light.


III. Tips for Making the Final Decision


Tip 1: Prioritize Density Over Color


The shade percentage is the most critical variable affecting photosynthesis and plant health. Focus on selecting the correct density first, then choose the color based on aesthetic preference, specific cooling needs, or budget.


Tip 2: Balance Cost and Durability (GSM)


Remember to pair your chosen density with the right GSM (Grams per Square Meter). For a permanent structure or high-wind area, choose a high GSM (e.g., $150 text{ GSM} +$) regardless of the density, as this dictates the net’s lifespan.


Tip 3: The Hardening-Off Strategy


For nurseries, it is common practice to use two different densities: use a $75%$ net for initial germination, then move seedlings to a $50%$ net for a period (hardening-off) before transplanting them to the open field.


Tip 4: Consult Local Experts


Always consult local agricultural extension services or experienced farmers in your area. They have empirical data on which shade net densities and colors perform best under specific local climatic conditions and for particular cash crops.

Shielding the Green: How Shade Nets Protect Plants from Harsh Sunlight

Shielding the Green: How Shade Nets Protect Plants from Harsh Sunlight

Introduction: The Double-Edged Sword of Sunlight

Sunlight is the lifeblood of every plant, providing the energy for photosynthesis. However, too much of a good thing can be catastrophic. In today’s climate, intense, unfiltered sunlight and accompanying heat waves pose a severe threat, leading to stress, dehydration, and reduced yields.

HDPE (High-Density Polyethylene) Shade Nets are the most effective and affordable solution farmers use to manage this risk. They don’t just block light; they scientifically modify the environment to create an optimal, stress-free microclimate where plants can dedicate maximum energy to growth and fruit production, rather than survival.

This guide delves into the precise mechanisms by which shade nets protect your valuable crops from the harsh realities of excessive solar radiation.


I. The Scientific Mechanism of Protection: Filtering and Diffusion

Shade nets protect plants by tackling the two main components of solar energy: intensity (quantity of light) and radiation (heat).

1. Reducing Light Intensity (The Quantity Control)

The most obvious function of a shade net is to reduce the amount of light reaching the plant. This is determined by the Shade Percentage (e.g., $35%$ or $50%$).

  • Preventing Photo-Oxidation (Sunscald): Intense solar energy can overwhelm a plant’s photosynthetic machinery. When light is too intense, the plant cannot process the energy fast enough, leading to the formation of damaging free radicals. This process, known as photo-oxidation, causes white or brown scorch marks on leaves and fruit. The shade net filters this intensity, keeping the light level within the plant’s safe metabolic range.

2. Diffusing Light Quality

This is perhaps the most beneficial aspect. The knitted or woven structure of the HDPE net does not just create a simple shadow; it scatters the light.

  • Uniform Penetration: Direct sunlight creates harsh shadows, leaving lower leaves unexposed and inefficient. Diffused light is scattered in multiple directions, allowing it to penetrate deeper into the plant canopy. This ensures that lower leaves contribute to photosynthesis, leading to more uniform growth, bushier plants, and higher overall yield.

  • Reduced Self-Shading: Better light distribution minimizes the problem of upper leaves shading the lower ones, maximizing the plant’s total energy production surface.


II. Mitigating Temperature and Heat Stress

High temperatures are often more damaging than the light itself, and shade nets directly address this thermal stress.

1. Lowering Ambient Air Temperature

  • Radiation Blockage: By blocking a significant percentage of solar radiation, the net reduces the amount of energy absorbed by the air and ground underneath. This can lower the temperature in the shade house by $5^circ C$ to $10^circ C$ during peak heat hours.

  • Reduced Transpiration: The cooling effect and wind reduction dramatically decrease the rate of transpiration (water loss through leaves). This allows the plant to conserve water and prevent wilting and dehydration, ensuring energy is spent on growth, not survival.

2. Protecting Key Reproductive Stages

  • Flower Drop Prevention: Many crops, particularly fruiting vegetables like tomatoes and capsicum, will abort (drop) their flowers when temperatures exceed a certain threshold (often $35^circ C$). The shade net maintains the temperature below this critical point, ensuring successful flower retention and fruit setting, which is vital for high yields.


III. Physical and Environmental Safeguards

Beyond light and heat, shade nets provide robust physical protection necessary for delicate plant structures.

1. Wind and Moisture Stress Reduction

  • Windbreak Effect: The mesh structure acts as a windbreak, reducing the air speed over the plants. High wind increases transpiration and can cause physical damage (scuffing, broken stems).

  • Water Conservation: By reducing both wind and heat, the net significantly lowers the rate of evaporation from the soil, leading to major water savings and stable soil moisture—a key factor in preventing stress-related diseases.

2. Protection from Weather Events

  • Impact Buffering: Shade nets buffer the force of heavy raindrops, preventing soil splash (which spreads disease) and physical damage to leaves. Denser nets also offer a degree of protection against small hailstones.

Secure Your Harvest: A Step-by-Step Guide to Installing HDPE Shade Nets

Secure Your Harvest: A Step-by-Step Guide to Installing HDPE Shade Nets

Introduction: Installation is the Foundation of Durability

The quality of your HDPE shade net (measured by its GSM and UV stabilization) is only half the equation; the other half is proper installation. A net, no matter how durable, will fail quickly if it is not installed correctly—especially if it sags, flaps, or is inadequately anchored.

This step-by-step guide is designed to walk small and medium-scale farmers through the professional installation of an HDPE shade net structure. By following these instructions, you will ensure maximum tension, structural stability, and longevity for your protected cultivation environment.


Phase 1: Planning and Preparation

Careful planning minimizes errors and material waste during the setup process.

Step 1: Site Selection and Layout

  1. Choose a Level Area: Select a site that is as level as possible to ensure uniform tension on the net.

  2. Clear the Ground: Remove all rocks, debris, and roots. The ground must be clear to prevent damage to the net during unrolling and to facilitate easy post-hole digging.

  3. Determine Dimensions: Accurately measure the length (L) and width (W) of the area to be covered.

  4. Mark Post Positions: Mark the location of the posts. For standard shade houses, posts should be spaced 3 to 4 meters (10 to 13 feet) apart in a grid pattern. Corner and perimeter posts require maximum strength.

Step 2: Material Verification and Preparation

  1. Verify Net Specifications: Ensure you have the correct shade percentage (e.g., $50%$) and GSM (e.g., $150 text{ GSM}$) for your crops and climate.

  2. Gather Tools: Collect all necessary tools: measuring tape, string/chalk line, post hole digger (or auger), level, hammer, concrete mix (optional but highly recommended), and tensioning hardware (turnbuckles or rope).


Phase 2: Erecting the Support Structure

The frame must be robust enough to handle the weight of the net, wind loading, and potential rainwater accumulation.

Step 3: Digging and Securing Post Holes

  1. Dig Deep: Dig post holes to a depth of at least 1.5 to 2 feet (45–60 cm). In sandy or high-wind areas, go deeper.

  2. Set Corner Posts: Place the corner posts first. These should be larger or better anchored than the interior posts. Use a spirit level to ensure the posts are perfectly plumb (vertical).

  3. Concrete Anchor (Recommended): Pour a concrete mixture around the base of the posts and tamp it down firmly. Allow the concrete to cure fully (typically 24–48 hours) before proceeding to the next step.

Step 4: Installing Top Support Wires/Cables

  1. Maintain Consistent Height: Ensure all posts are cut or set to a uniform height (typically 8–12 feet).

  2. Run Top Wires: Connect the tops of the posts by running high-tensile galvanized steel wire or cable horizontally along the perimeter and potentially across the interior (especially for wide spans).

  3. Tension the Wires: Use turnbuckles or heavy-duty wire tensioners at the ends of the perimeter wires to pull them taut. The net will be attached to these wires, so they must be strong and stable.


Phase 3: Net Installation and Tensioning

This phase is critical for ensuring the net is tight and protected from wind damage. It is best done with 2-3 people.

Step 5: Laying Out the Net

  1. Unroll Carefully: Lay the shade net on a clean, cleared area beside the structure. Avoid dragging the net across rough ground or sharp objects to prevent snags.

  2. Position: Gently lift the net and drape it over the entire support structure. Ensure the net is centered with an even overhang on all sides.

Step 6: Securing the Anchor Side (The First Side)

  1. Choose a Long Edge: Start by permanently securing the net along one of the longest side wires/cables. This becomes your anchor side.

  2. Attachment Method: Use UV-stabilized shade net clips or a continuous lacing rope/wire to fasten the net to the top wire. Attachments should be made every 1 to 1.5 feet (30–45 cm) to evenly distribute the tension load.

Step 7: Applying Maximum Tension (The Opposite Side)

  1. Pull Taut: Move to the opposite long side of the structure. This is where the net must be pulled firmly. The goal is to remove all wrinkles and slack.

  2. Secure Under Tension: While maintaining tension manually, secure the net to the opposite side wire/cable using the same clips or lacing rope. The net should feel drum-tight—tight enough to resist flapping but not so tight that it strains the posts.

Step 8: Finishing and Anchoring the Ends

  1. Secure Ends: Attach the net securely to the end posts and wires, pulling out any remaining slack horizontally and vertically.

  2. Ground Anchor: Secure the net along the bottom perimeter. You can fasten it to a ground cable, anchor it with heavy stakes every few feet, or slightly bury the bottom edge in a shallow trench to prevent pests from entering and the wind from lifting the net.

  3. Trim Excess: Carefully cut any significant excess material, leaving enough overlap to fold or secure the edges neatly.


Phase 4: Post-Installation Checklist

Step 9: Final Inspection

  1. Check for Sagging: Ensure there are no low spots where rainwater could pool. Sagging indicates insufficient tension and must be corrected immediately.

  2. Verify Attachments: Confirm that all clips and ties are securely fastened and that the net is protected from rubbing against any sharp edges on the posts or cables.

  3. Monitor Airflow: Ensure the side walls allow for adequate airflow and ventilation to prevent heat and humidity buildup beneath the net.


Frequently Asked Questions (FAQ)

Q1: What is the main cause of shade net failure?

A: The main cause is wind damage and fatigue resulting from a net that is not pulled taut enough. A loose net flaps, leading to accelerated material wear and tear along the edges and attachment points.

Q2: Should I use rope or clips to attach the net?

A: Shade net clips are fast and effective for perimeter attachment. For maximum long-term security, a continuous lacing rope or high-tensile wire woven through the net and around the cable is often preferred, as it distributes tension most evenly.

Q3: How much allowance (overhang) should I leave when measuring the net?

A: It is recommended to purchase the net cut with an allowance of 1 to 2 feet (30–60 cm) on each side beyond the frame dimensions. This extra material is needed for proper tensioning and to wrap around the support cables.

Q4: What should I do if the net sags after a few weeks?

A: Sagging indicates the net has stretched slightly, or the support wires have loosened. You must re-tension the net immediately. Adjust the turnbuckles on the support wires or re-tie the anchor side to remove the slack before it causes damage.

A Legacy of Trust: Premier Polytech’s 5 Years of Unwavering Quality and Reliability

A Legacy of Trust: Premier Polytech’s 5 Years of Unwavering Quality and Reliability

Introduction: Five Years of Farming Success

In the dynamic world of modern agriculture, a supplier’s reputation is built on two fundamental promises: Quality and Reliability. For five years, Premier Polytech has not just met these promises; it has established itself as a cornerstone in the protected cultivation sector, empowering thousands of small and medium farmers across India with superior HDPE (High-Density Polyethylene) shading solutions.

Five years marks a significant milestone—it represents half a decade of nets withstanding intense sun, severe monsoons, and high winds, season after season. This success is not accidental; it is the result of a steadfast commitment to using only the best materials, adhering to rigorous manufacturing standards, and prioritizing the farmer’s long-term profitability.

This article delves into the core principles that define Premier Polytech’s five-year legacy of quality and reliability, making it the trusted choice for your farm infrastructure.


I. Defining Quality: Material and Manufacturing Excellence

Premier Polytech’s commitment to quality starts at the fundamental level: the raw materials and the production process.

1. Virgin HDPE and Superior UV Stabilization

  • The Difference: Unlike manufacturers who use recycled or low-grade plastics, Premier Polytech uses virgin, High-Density Polyethylene polymers. This material forms the strongest base for the net.

  • The Longevity Factor: Every net is manufactured with a high percentage of UV Stabilizers (typically $3%$ to $5%$). This crucial additive is what allows their nets to resist the relentless breakdown caused by the sun’s ultraviolet rays, guaranteeing a lifespan of 5+ years—the very benchmark of their reliability.

2. Precision Knitting and Structural Integrity

  • Uniform GSM: The manufacturing process ensures a highly uniform GSM (Grams per Square Meter) across the entire roll. This consistency is vital for providing uniform shade and strength.

  • Lock-Stitch Weave: Many of their nets feature a specialized lock-stitch weave. This ensures that even if the net is accidentally punctured or cut, the damage does not ‘run’ or unravel across the fabric, making minor repairs easy and maintaining the net’s structural integrity over years of use.


II. The Pillar of Reliability: Performance and Consistency

Reliability in agriculture means the infrastructure performs consistently, regardless of environmental challenges.

1. Predictable Climate Control

  • Consistent Shade Percentage: Premier Polytech nets are rigorously tested to ensure they deliver the exact advertised shade percentage (e.g., $50%$ or $75%$). This precision allows farmers to manage the microclimate accurately, leading to predictable crop growth and yield.

  • Wind and Tear Resistance: The high tensile strength of the nets allows them to be tensioned tautly, preventing flapping and sagging. A taut net handles wind loading better and avoids the water pooling that can lead to structural collapse, offering reliable protection during severe weather.

2. Financial Trust and ROI

  • Guaranteed Lifespan: Reliability is demonstrated through their commitment to product lifespan. By lasting 5 years or more, Premier Polytech nets offer a much lower Cost Per Year of Use (CPY) compared to cheaper alternatives. This superior Return on Investment (ROI) provides financial stability for the farmer.

  • Reduced Downtime: Consistent quality means fewer unexpected net failures, less time spent on emergency repairs, and greater labor efficiency, allowing the farm crew to focus reliably on core cultivation tasks.


III. Comprehensive Product Range for Diverse Needs

Premier Polytech’s reliability extends to its ability to meet a wide array of specialized farming and commercial needs across their five years of operation.

Product Category Reliability Focus Application Example
Standard Shade Nets Consistent UV protection & durability Vegetable Net Houses (Tomatoes, Capsicum)
Anti-Hail Nets Physical resilience and impact strength Protecting Orchards and Vineyards
Windbreak Nets Sustained tension and structural stability Perimeter protection in high-wind zones
Agri Films/Tarps Uniform thickness and waterproofing Pond lining and temporary storage

Conclusion: Securing the Next Five Years

Premier Polytech’s five-year milestone is not just a celebration of time, but a testament to the thousands of successful harvests achieved under their nets. Quality materials ensure longevity, and structural integrity ensures reliable performance.

By choosing Premier Polytech, you are choosing a partner whose track record demonstrates an unwavering commitment to protecting your most valuable asset—your crops—and securing your farm’s profitability, now and for the next five years.

Fewer Fixes, More Profit: How HDPE Nets Reduce Maintenance Costs in Agriculture

Fewer Fixes, More Profit: How HDPE Nets Reduce Maintenance Costs in Agriculture

Introduction: The Hidden Cost of Farming

In agriculture, profitability isn’t just about maximizing yield; it’s about minimizing the expenses that chip away at the bottom line. Among these recurring expenses, maintenance and repair costs—from fixing damaged net structures and replacing worn-out nets to treating disease outbreaks—can be substantial and unpredictable.

HDPE (High-Density Polyethylene) Shade Nets offer a powerful solution. By choosing durable, high-quality HDPE nets, farmers are essentially building an insurance policy against ongoing structural damage, material degradation, and weather-related disasters.

This guide breaks down the specific ways in which investing in quality HDPE nets translates directly into lower maintenance costs, better labor efficiency, and ultimately, a more stable financial future for your farm.


I. Reducing Material Replacement and Repair Costs

The most direct cost saving comes from the inherent durability of the net itself.

1. Exceptional UV Resistance

  • The Problem: Cheap nets lack sufficient UV stabilization, causing the plastic to become brittle, degrade, and tear after just 1-2 seasons. This forces constant replacement and patchwork.

  • The Solution: Quality HDPE nets are heavily treated with UV stabilizers ($3%$ to $5%$), ensuring they maintain their physical integrity and flexibility for 5 to 8 years. This extended lifespan drastically reduces the frequency and cost of purchasing new material.

2. Superior Tear and Abrasion Resistance

  • Knitting Structure: Durable HDPE nets often use a lock-stitch or heavy-duty weave which provides excellent tensile strength and resilience. This means the nets can withstand handling, installation stress, and rubbing against the support structure without easily developing holes.

  • Preventing Runaway Tears: If a small hole does occur, the lock-stitch weave prevents the tear from “running” across the net, keeping the damage localized and making simple repairs feasible and permanent.

3. Withstanding Weather Loads

  • Wind Resistance: When properly tensioned, a high GSM (Grams per Square Meter) HDPE net resists flapping and wind damage far better than lightweight alternatives. Flapping is the leading cause of wear and tear along edges and attachment points.

  • Hail and Rain: The net reduces the impact force of heavy rain and small hail, protecting not only the crops but also the net material itself from immediate physical damage.


II. Lowering Structure Maintenance and Labor Costs

The net’s stability directly impacts the structural components of the shade house, leading to savings on labor and hardware.

1. Reduced Structure Strain

  • Sagging Prevention: A durable net maintains its tension better than cheaper alternatives, which are prone to stretching and sagging. A saggy net collects rainwater, adding immense weight that can warp or even collapse poles and support wires.

  • Labor Savings on Re-tensioning: Because the durable net holds tension for longer periods, farmers spend less time and labor re-tightening the net and fixing structural components after every major weather event.

2. Efficient Installation Hardware

  • Secure Attachment: High-quality nets often feature reinforced edges (grommets or eyelets) that are designed to handle high tension and heavy-duty hardware like tension cables and turnbuckles. This prevents failure at the attachment points, which are common failure zones on cheaper nets.

  • Fewer Labor Hours: Less material failure means less time spent by skilled labor on emergency repairs, allowing the farm crew to focus on core tasks like planting and harvesting.


III. Cutting Down on Input and Disease Control Costs

The stable microclimate created by the HDPE net leads to healthier plants and lower input costs.

1. Reduced Pesticide and Fungicide Use

  • Physical Barrier: The netting acts as a simple barrier against birds and larger insects, reducing the need for chemical pest control.

  • Disease Prevention: Good ventilation and moderated humidity beneath the net, facilitated by the material’s design, significantly reduce the ideal conditions for fungal and bacterial diseases (like Powdery Mildew). Fewer diseases mean lower costs for fungicides.

2. Savings on Irrigation System Maintenance

  • System Integrity: By reducing the wind and sun exposure on irrigation hoses and drip lines, the net helps prevent cracking and degradation of plastic components.

  • Fewer Clogs: Less evaporation and more stable water pressure mean fewer system clogs and less time spent cleaning or replacing drip emitters.


Conclusion: Durability as a Financial Strategy

The logic is simple: high-quality HDPE nets reduce maintenance costs by eliminating the causes of damage. Investing in a durable, UV-stabilized net with high GSM is a strategic financial decision that minimizes unpredictable repairs, maximizes labor efficiency, and protects the farm’s valuable infrastructure and crop yield. By reducing the money spent on fixing problems, farmers can invest more directly in growth and profitability.


Frequently Asked Questions (FAQ)

Q1: How does a higher GSM net lower maintenance costs?

A: A higher GSM (Grams per Square Meter) means the net is thicker and stronger. This density translates directly into superior resistance against tearing, stretching, and damage from wind and hail, which are the main causes of structural maintenance costs.

Q2: Does the color of the net affect its maintenance cost?

A: Not significantly. Maintenance cost is primarily related to the net’s material quality (UV stabilization) and its structural integrity (GSM/Weave). However, light colors (like white) may require slightly more frequent cleaning to maintain maximum light reflection, but this is a minor cost.

Q3: What maintenance should be done on a quality net?

A: Even durable nets require minimal maintenance. Key steps include:

  • Visual Inspection: Checking for proper tension and securing all tie-downs, especially after strong winds.

  • Cleaning: Hosing down the net annually to remove dust and debris that can compromise light transmission and weight.

  • Prompt Repair: Immediately stitching or patching any minor tears to prevent them from expanding.

Q4: How can I ensure the net I buy is genuinely durable for long-term use?

A: Always ask the supplier for the net’s specification sheet. Key indicators are:

  • A guaranteed lifespan (e.g., 5-8 years).

  • A specified UV stabilization percentage (must be $3%$ or higher).

  • A high GSM suitable for your climate (e.g., $110 text{ GSM}$ and above for most permanent structures).

Farming for the Future: The Crucial Role of Shade Nets in Sustainable Agriculture

Farming for the Future: The Crucial Role of Shade Nets in Sustainable Agriculture

Introduction: Sustainability is the New Yield

In an era defined by climate volatility, dwindling water resources, and the need for food security, the focus of agriculture is shifting from simply maximizing yield to achieving sustainable yield. Sustainable farming practices are those that protect the environment, ensure economic viability, and maintain social responsibility for future generations.

HDPE (High-Density Polyethylene) Shade Nets are emerging as a fundamental tool in this sustainability revolution. They are a low-cost, high-impact technology that directly addresses key environmental challenges—from water scarcity to climate change mitigation—while simultaneously boosting the farmer’s economic resilience.

This guide explores the essential and multifaceted role that shade nets play in creating a more sustainable, efficient, and resilient agricultural system.


I. Resource Conservation: Water and Energy Efficiency

The most immediate and profound impact of shade nets on sustainability is their ability to conserve critical natural resources.

1. Water Conservation

  • Reduced Evapotranspiration: The shade net reduces air temperature and slows down wind speed across the soil and plant surfaces. This drastically lowers the rate of evapotranspiration (water loss through evaporation and plant transpiration).

  • Sustainable Farming Impact: Farmers using shade nets report water savings of 20% to 50%. This is a game-changer in arid and semi-arid regions, allowing farms to thrive with less strain on groundwater and irrigation sources.

2. Soil Health Preservation

  • Moisture Stability: By reducing rapid moisture loss, shade nets help maintain consistent soil humidity, preventing the soil from baking hard and reducing salinity buildup.

  • Erosion Control: The nets break the kinetic force of heavy rainfall, preventing soil splash and reducing the risk of topsoil erosion, preserving the most fertile layer of the land.

3. Energy Efficiency in Operation

  • Reduced Pumping: Since less water is required, the energy needed to pump water for irrigation is significantly reduced, lowering the farm’s overall energy footprint and operational costs.


II. Climate Change Mitigation and Adaptation

Shade nets provide both a defensive layer (adaptation) and indirect environmental benefits (mitigation) against a changing climate.

1. Adapting to Extreme Heat

  • Climate Resilience: As global temperatures rise, heat stress is becoming the single biggest threat to crop viability. Shade nets ($35%$ to $50%$ for most crops) provide an immediate, localized solution, making crops viable in environments previously considered too hot.

  • Preventing Crop Failure: By stabilizing the growing environment, shade nets minimize the risk of massive crop failure during unpredictable heat waves, ensuring continuous food supply and farmer income.

2. Managing Light Quality

  • UV Filtering: Shade nets filter out harmful UV-B radiation, which can negatively impact crop physiology. The diffused light promotes efficient photosynthesis, even under challenging conditions, ensuring every unit of light is used effectively.


III. Economic Viability and Reduced Environmental Load

Sustainability must be economically feasible for the farmer. Shade nets contribute by lowering input costs and enhancing output quality.

1. Reduced Chemical Reliance

  • Physical Barrier: High-density shade nets can act as a crucial physical barrier against larger pests like birds and rodents, and when using specialized mesh (net house setup), against certain insects.

  • Lower Input Costs: By reducing pest entry and maintaining plant health (making them less susceptible to disease), the need for expensive and environmentally harmful chemical pesticides and fungicides is significantly reduced.

2. Long-Term Durability and Waste Reduction

  • Sustainable Sourcing: Choosing durable, high-quality HDPE nets (with high UV stabilization) means they last 5+ years.

  • Less Plastic Waste: Investing in longevity minimizes the need for frequent replacement, drastically reducing the farm’s plastic waste generation and lowering the long-term environmental burden associated with net disposal.

3. Enhancing Crop Quality and Market Value

  • Premium Product: Shade-net-grown produce often has better color, fewer blemishes (no sunscald or wind scuffing), and higher uniformity. This improved quality commands a premium price, ensuring the farmer’s long-term economic sustainability.


IV. Conclusion: Shading the Path to a Sustainable Future

The role of HDPE shade nets extends far beyond simple sun protection; they are catalysts for sustainable agricultural reform. By enabling substantial water savings, reducing the reliance on chemical inputs, building resilience against climate change, and ensuring the economic viability of the farm through high-quality yields, shade nets embody the principles of responsible farming.

Investing in these nets is not just a smart agricultural choice—it is a critical step toward securing a resource-efficient and environmentally sound food system for the future.


Frequently Asked Questions (FAQ)

Q1: How do shade nets contribute to reducing soil salinity?

A: Salinity often occurs when water evaporates quickly, leaving behind salts in the top layer of the soil. By slowing down the rate of water evaporation, shade nets help maintain deeper moisture content, preventing the rapid accumulation of salts on the surface, which is crucial for long-term soil health.

Q2: Does using a shade net make my farm organic?

A: No, using a shade net does not automatically make a farm organic. Organic certification requires adherence to strict guidelines regarding the source of all inputs (seeds, fertilizers, pest control). However, shade nets support organic farming goals by reducing the need for chemical pest and disease control, making it easier to maintain organic standards.

Q3: Which shade net color is most sustainable?

A: All HDPE nets offer similar sustainability benefits (durability, water saving). However, white nets are sometimes favored in extremely hot regions because they reflect more heat rather than absorbing it, slightly lowering the ambient temperature and further reducing the energy demands on the microclimate.

Q4: How can small farmers ensure they are purchasing the most sustainable net?

A: Small farmers should prioritize durability. Look for nets with a guaranteed lifespan (e.g., 5+ years), confirmed UV stabilization ($3%$ to $5%$), and a high GSM ($110 text{ GSM}$ or above). A durable net is the most sustainable net because it minimizes waste and ensures the benefits are realized over the longest possible time.

Using Shade Nets for Home Garden Ventilation and Sunlight Balance

Using Shade Nets for Home Garden Ventilation and Sunlight Balance

Introduction: The Home Gardener’s Microclimate Challenge

For the enthusiastic home gardener, success often comes down to managing the intense mid-day sun. Potted plants, raised beds, and delicate ornamentals can quickly suffer from heat stress, scorched leaves, and rapid soil drying, especially on patios, balconies, or small urban plots.

While professional farmers use shade nets for large-scale operations, these versatile tools are equally transformative for the backyard. HDPE (High-Density Polyethylene) Shade Nets offer the perfect solution to create a personalized, climate-controlled sanctuary for your plants, ensuring robust growth without the complexity or cost of a full greenhouse.

This guide explores how home gardeners can strategically use shade nets to achieve the optimal balance of diffused sunlight and essential ventilation, guaranteeing a healthier, more productive garden right outside your door.


I. Achieving Sunlight Balance: The Power of Diffused Light

The biggest threat to home gardens in summer is not just the heat, but the intensity of direct, unfiltered solar radiation.

1. Preventing Sunscald and Bleaching

  • Direct Sunlight Damage: Intense afternoon sun can burn the leaves and flowers of sensitive plants (like ferns, impatiens, and many herbs). This damage, known as sunscald, is irreversible.

  • The Solution: A shade net (usually for home gardens) filters the light, blocking the most damaging UV rays. This process converts harsh direct sun into soft, diffused light that penetrates the entire plant canopy without burning. This leads to healthier, greener foliage and vibrant flowers.

2. Ideal for Potted Plants and Raised Beds

  • Targeted Protection: Unlike field crops, potted plants and raised beds heat up faster and dry out quicker. A shade net suspended above these areas creates a localized cool zone, shielding the root systems from excessive heat buildup.

  • Custom Placement: Nets can be easily draped over simple DIY frames (like PVC pipe or bamboo structures) to provide shade exactly where it is needed—perfect for small, uneven backyard spaces.

3. Optimizing Specific Plants

  • Vegetables: In hot climates, crops like lettuce, spinach, and even tomatoes can benefit from moderate shade to prevent bolting (flowering prematurely) and stress, ensuring a longer, sweeter harvest.

  • Ornamentals: Shade-loving flowers and foliage plants, which often struggle near sunny walls or concrete surfaces, thrive under the consistent, gentle light provided by the net.


II. Enhancing Ventilation: The Key to Health

Shade nets are unique because, while they block light, they are made of a breathable mesh, which is crucial for air exchange.

1. Preventing Heat Trapping

  • Airflow is Essential: Unlike solid tarps or clear plastic covers, the mesh structure of an HDPE net allows air to pass through freely. This prevents stagnant air pockets and the dangerous buildup of humidity and heat that can occur under solid covers.

  • Evacuation of Warm Air: The open weave ensures that warm air can easily escape and be replaced by cooler air, maintaining the critical temperature differential beneath the net.

2. Reducing Disease Risk

  • Controlling Humidity: Stagnant, humid conditions are the primary breeding ground for fungal diseases like Powdery Mildew and Rust, which are common in dense home gardens. Good ventilation, facilitated by the net’s structure, keeps leaf surfaces drier.

  • Pest Deterrence: The physical barrier of the net can discourage larger pests like birds from attacking seedlings and soft fruits.


III. Practical Tips for Home Garden Setup

Choosing the right net and setting it up correctly is essential for maximizing benefits.

1. Choosing the Right Shade Percentage

  • Go Lighter: For most home gardens, start with a 35% or 40% net. This offers adequate protection without severely compromising light.

  • Use 50% to 75% only for extremely delicate plants like Orchids or young seedlings or in regions with extremely intense, non-stop summer heat.

2. DIY Structure and Installation

  • Height Matters: Ensure the net is installed high enough (ideally 6-7 feet high) to allow for comfortable working space and to facilitate good air circulation above the plants.

  • Simple Frames: Use common materials like PVC pipes (easy to bend for a hoop house effect), wooden posts, or attach the net to existing structures like pergolas or fences.

  • Tensioning: The net should be pulled taut and secured with strong clips or ties. A sagging net is prone to wind damage and collects debris.

3. Water Conservation

  • Reduced Evaporation: The cooling effect of the net dramatically reduces the rate at which water evaporates from the soil in containers and raised beds, meaning you water less frequently—saving both time and water resources.


Conclusion: A Simple Tool for Sophisticated Gardening

The HDPE shade net is the home gardener’s best friend. It is a simple, affordable, and durable solution that brings professional-grade environmental control to your backyard. By strategically using a net to balance sunlight and ensure ample ventilation, you can successfully mitigate the challenges of summer heat, guaranteeing your potted plants, vegetables, and ornamental flowers thrive, resulting in a greener, more beautiful, and more productive outdoor space.


Frequently Asked Questions (FAQ)

Q1: What is the best color shade net for a small home garden?

A: Green or Black are the most common. Green often looks more aesthetically pleasing in a home garden and blends in with the foliage. Black offers marginally better UV absorption and cooling. For a mixed garden, Green is often the preferred choice for its visual harmony.

Q2: Can I just drape the net directly onto the plants?

A: No, avoid direct contact. Draping the net directly onto plants can crush delicate foliage, trap heat right against the leaves, and negate the benefits of ventilation. Always suspend the net on a frame, ensuring a 1-2 foot gap between the net and the tallest plants.

Q3: When should I remove the shade net?

A: The net should be in place during the peak heat months (typically May through September). Once the intensity of the summer sun subsides and temperatures drop below, you can remove or roll up the net sides to maximize natural light during the cooler growing seasons.

Q4: How long will a quality shade net last in a home garden?

A: A quality, UV-stabilized HDPE net purchased from a reputable supplier will easily last 3 to 5 years in a home garden setting. Proper tensioning and clean, dry winter storage can extend its life even further.

How to Choose the Right GSM for Your Shade Net Project

How to Choose the Right GSM for Your Shade Net Project

Introduction: Understanding GSM in Shade Nets

When selecting a shade net, you typically look at the Shade Percentage (how much light is blocked) and the Color. However, a critical factor that dictates a net’s quality, durability, and structural integrity is its GSM (Grams per Square Meter).

GSM is simply the weight of the net fabric per square meter. It is a direct indicator of the amount of material (HDPE polymer) used in the weaving. A higher GSM signifies a thicker, denser, and stronger net. Choosing the right GSM is essential because it determines how long your net will last, how well it will withstand wind and hail, and ultimately, how secure your crop investment will be.

This guide breaks down the concept of GSM and provides a clear framework for selecting the appropriate weight for your specific project, from temporary shading to permanent, high-wind structures.


I. GSM and the Three Pillars of Net Quality

The GSM of a shade net directly influences three vital characteristics: Durability, Strength, and Price.

1. Durability and Longevity

  • Higher Material Mass: A higher GSM means there is more polymer material in the net. This material absorbs stress, resists abrasion, and – crucially – contains more UV stabilizers per area.

  • Long-Term Use: Nets with higher GSM are significantly more resistant to cracking and degradation from sunlight, leading to a much longer service life (5+ years). Lower GSM nets may become brittle and fail quickly.

2. Tensile Strength and Resilience

  • Wind Resistance: Thicker nets (higher GSM) offer greater tensile strength, meaning they can withstand stronger pulling forces and wind loads without stretching, tearing, or flapping.

  • Hail and Debris Protection: Higher GSM nets provide a more robust physical barrier against falling debris, bird damage, and the impact of hail, offering superior physical protection to your crops.

3. Cost and Investment

  • Upfront Cost: GSM is the main driver of cost. Nets with a higher GSM require more raw material and thus have a higher initial price point.

  • Long-Term Value: While more expensive initially, a high-GSM net offers lower Cost Per Year of Use (CPY) due to its extended lifespan and reduced repair needs, making it the more cost-effective choice in the long run.


II. Selecting GSM Based on Project Type

The right GSM depends heavily on the application, the crop value, and the severity of the local climate.

Project Type / Required Protection Recommended GSM Range Rationale
Temporary/Seasonal Shading $80 – 100  { GSM}$ Suitable for short-term use, basic frost cover, or small seasonal nursery setups where budget is highly constrained.
General Agriculture (Permanent) $110 – 150 { GSM}$ Ideal for standard net houses for vegetables (e.g., Tomato, Capsicum). Offers excellent balance of strength, longevity (3-5 years), and cost.
High-Wind Areas/Floriculture $150 – 180 { GSM}$ Necessary for regions with strong winds, or for high-value crops (like Orchids, Roses) where structural failure would be catastrophic.
Premium Parking/Heavy-Duty $180 – 220 { GSM}$ Used for carports, industrial enclosures, or as primary anti-hail structures, requiring maximum material density for impact resistance.


III. The Relationship Between GSM and Shade Percentage

It is a common misconception that a higher GSM automatically means a higher shade percentage. This is not always true, as two different factors determine the net’s properties:

For example, a $150 { GSM}$ net can be knitted to provide $35 shade (using thick yarn but a loose knit) or $75 Shade (using thick yarn but a tight knit).

Key takeaway: Always select the Shade Percentage based on your crop’s light needs, and then select the GSM based on your required durability and weather resilience.


IV. Practical Considerations for Installation

Choosing a high GSM net requires careful planning for installation to maximize its benefits.

1. Structural Load

2. Airflow vs. Density

  • Airflow Concern: While necessary for strength, very high GSM nets are denser, which can potentially impede airflow slightly more than lighter nets. In extremely hot, high-humidity climates, ensure the structure is tall enough and has adequate side ventilation to prevent heat buildup.


Conclusion: A Decision of Value, Not Just Cost

Choosing the right GSM is fundamental to securing a successful protected cultivation project. Do not base your decision solely on the Shade Percentage; recognize that GSM is the measure of the net’s strength, lifespan, and resilience against the elements.

By investing in a higher GSM net appropriate for your region’s climate and the long-term value of your crops, you are guaranteeing structural longevity, reducing maintenance headaches, and securing predictable, high-quality yields for many seasons to come.


Frequently Asked Questions (FAQ)

Q1: If two nets have the same shade percentage but different GSMs, which should I choose?

A: Choose the higher GSM net. If both block the same amount of light, the higher GSM net will be thicker, stronger, and more durable. It will resist wind damage better and last longer, providing superior long-term value.

Q2: Does higher GSM mean a net is always better?

A: Not always. While higher GSM is stronger, it is also heavier and more expensive. For very large, simple applications in moderate weather, a mid-range GSM  might be the perfect balance of cost and performance. Over-specifying GSM for a small, temporary structure is unnecessary spending.

Q3: How can I verify the GSM claimed by the manufacturer?

A: While large-scale verification requires laboratory testing, you can perform a simple check: weigh a sample piece of a known size . If the net weighs close to 150 grams, the GSM is approximately 150. Always purchase from reputable suppliers who provide a clear product specification sheet.

Q4: Is GSM the same as the net’s thickness?

A: GSM is a measure of mass per area, which is closely related to overall thickness and material density. While not a direct thickness measurement (thickness is hard to measure accurately due to the mesh), a higher GSM means more material and thus a thicker, more substantial net overall.